
How to Use Tar and Cpio for Archiving on Linux
Learn the essential tar and cpio commands for Linux archiving. This guide covers basic operations, when to use each tool, and practical scenarios for backup operations.

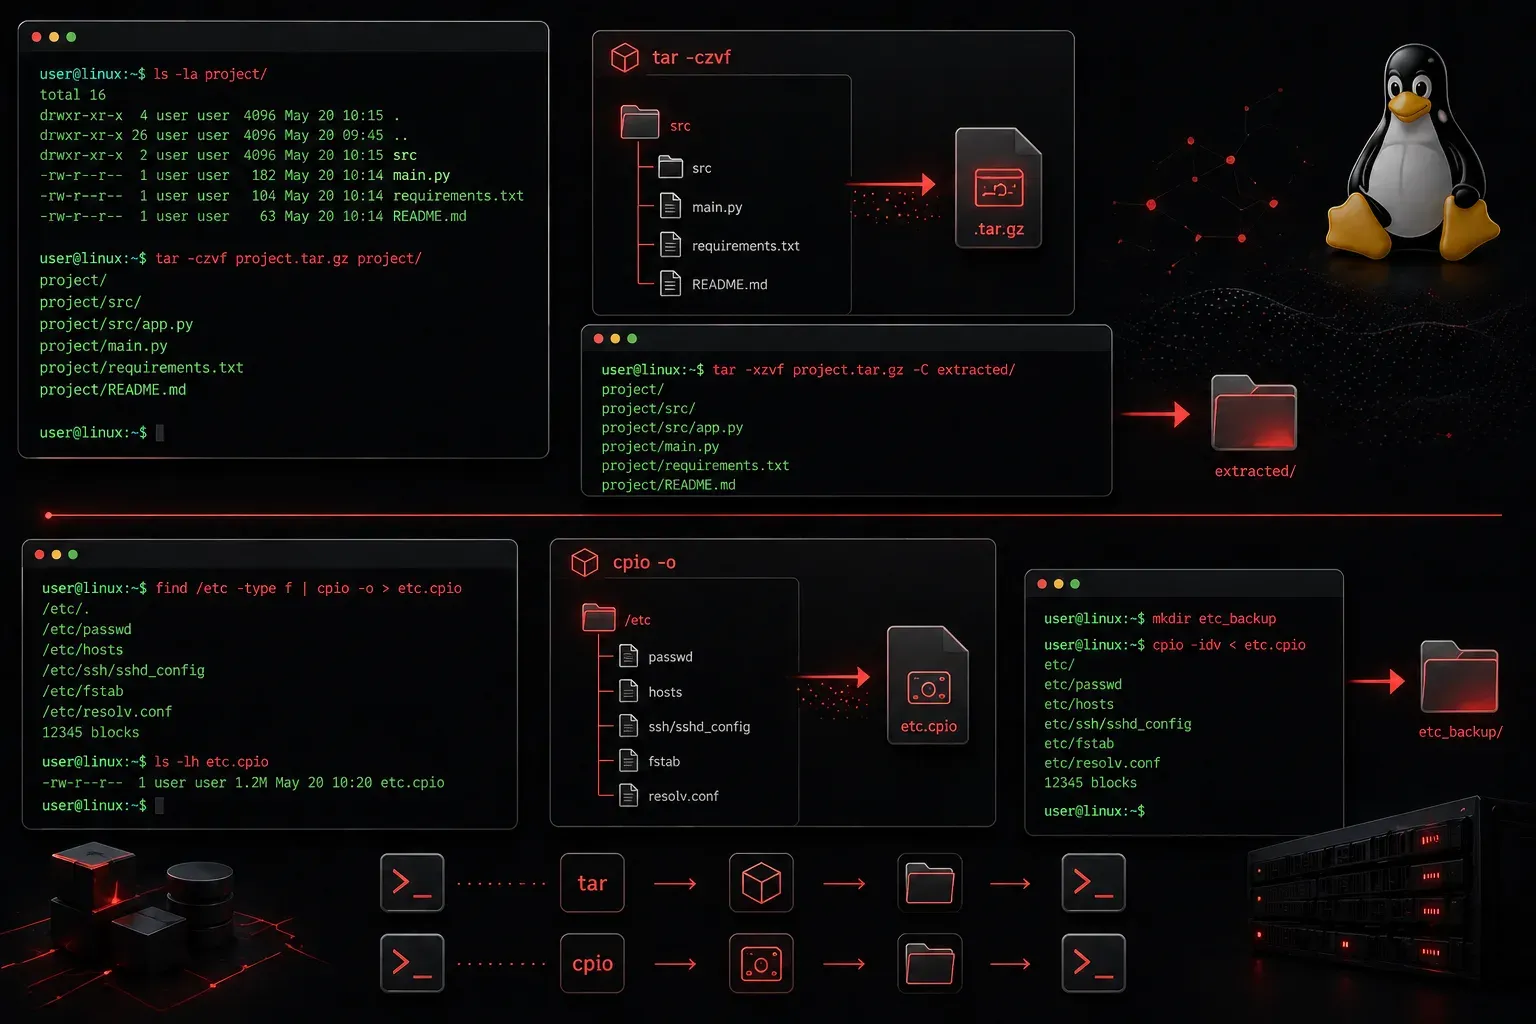
When managing a Linux system, creating archives is an essential skill for backup operations, file distribution, and system administration. Two powerful Linux archiving tools stand out: tar and cpio. While both can create archives, they serve different purposes and excel in specific scenarios.
Understanding Tar: The Tape Archive
The tar command is probably the most common archiving tool you'll encounter on Linux systems. Originally designed for tape drives (hence "Tape ARchive"), tar creates a single file from multiple files and directories while preserving file permissions, ownership, and directory structure.
Basic Tar Operations
Here are the essential tar operations every Linux administrator should know:
# Create an archive
tar -cvf backup.tar /home/user/documents

# Extract an archive
tar -xvf backup.tar

# List contents without extracting
tar -tvf backup.tar

# Create compressed archive with gzip
tar -czf backup.tar.gz /home/user/documents

# Extract compressed archive
tar -xzf backup.tar.gz
The common options break down as follows:
-c: Create archive-x: Extract archive-v: Verbose output-f: Specify filename-z: Compress with gzip-t: List contents
When to Use Tar
Tar excels when you need to:
- Archive entire directory structures
- Preserve file permissions and ownership
- Create compressed backups
- Distribute software packages
Understanding Cpio: Copy In, Copy Out
The cpio command operates differently from tar. Instead of specifying files on the command line, cpio reads filenames from standard input, making it incredibly flexible for complex file selection scenarios.
Basic Cpio Operations
Cpio has three modes of operation:
# Copy-out mode (create archive)
find /home/user -name "*.txt" | cpio -ov > textfiles.cpio

# Copy-in mode (extract archive)
cpio -iv < textfiles.cpio

# Copy-pass mode (copy files to another location)
find /source -name "*.log" | cpio -pdv /destination
Key cpio options include:
-o: Copy-out (create)-i: Copy-in (extract)-p: Copy-pass (copy files)-v: Verbose output-d: Create directories as needed
When to Use Cpio
Cpio shines when you need to:
- Archive files based on complex criteria using
find - Create archives from file lists
- Handle special file types (device files, pipes)
- Work with backup systems that require specific formats
Practical Scenarios
Scenario 1: Daily Home Directory Backup
# Using tar for complete directory backup
tar -czf /backup/home_$(date +%Y%m%d).tar.gz /home/user
Scenario 2: Archiving Only Modified Files
# Using cpio with find to archive files modified in last 7 days
find /var/log -mtime -7 -type f | cpio -ov > recent_logs.cpio
Scenario 3: System Configuration Backup
# Using tar to backup system configuration
tar -czf /backup/etc_backup.tar.gz /etc
Choosing Between Tar and Cpio
Use tar when you want simplicity and are archiving complete directories or well-defined file sets. It's more intuitive and widely supported.
Choose cpio when you need fine-grained control over which files to archive, especially when combining with find commands for complex file selection criteria.
What's Next
Now that you understand the basics of tar and cpio for archiving, the next step is learning about automated backup strategies using cron jobs and backup scripts. We'll also explore how to implement incremental backups and restoration procedures for complete system recovery scenarios.
Tools and resources for this topic
- CompTIA Linux+ Study Guide — Comprehensive Linux+ exam preparation covering system administration, security, and scripting.