
How to Configure IPv4 Network Services for Beginners
A beginner-friendly guide to configuring IPv4 network services, covering static IP setup, DHCP configuration, and verification steps. Includes practical examples and common troubleshooting tips for new network technicians.

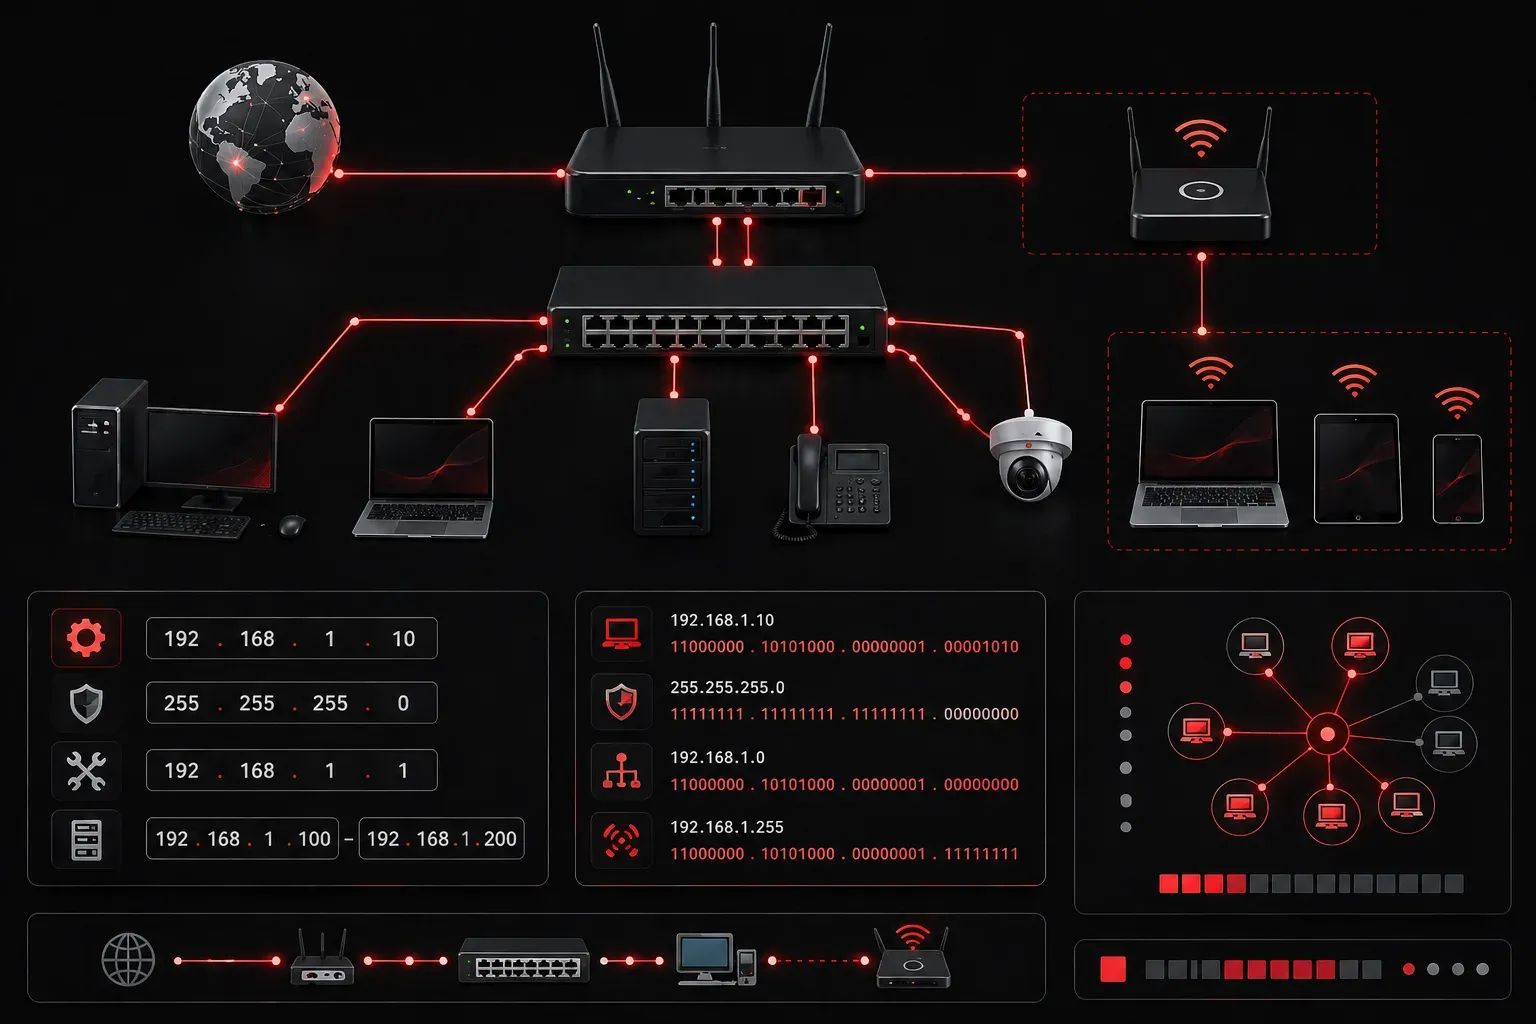
Setting up IPv4 network services is one of the fundamental skills every network technician needs to master. Whether you're configuring a single device or an entire network segment, understanding how to properly configure IPv4 settings will form the foundation of your networking career. Let's walk through the essential steps to get your network up and running.
Understanding IPv4 Configuration Basics
Before diving into the actual configuration steps, it's important to understand what we're working with. IPv4 configuration involves setting up four key components on each network device:
- IP Address: The unique identifier for the device on the network
- Subnet Mask: Defines which portion of the IP address represents the network
- Default Gateway: The router that connects your network to other networks
- DNS Servers: Translate domain names to IP addresses
Think of these like a postal address system. The IP address is your house number, the subnet mask defines your neighborhood, the default gateway is the main road out of your neighborhood, and DNS is like a phone book that helps find specific addresses.
Step-by-Step IPv4 Setup Process
Planning Your Network Configuration
Before you start typing commands, plan your network layout. For a basic office network, you might use:
- Network:
192.168.1.0/24 - Router/Gateway:
192.168.1.1 - DHCP Range:
192.168.1.100-192.168.1.200 - DNS Servers:
8.8.8.8and8.8.4.4(Google DNS)
Configuring Static IP Addresses
For servers and network infrastructure devices, you'll often need to configure static IP addresses. Here's how to do it on different systems:
Windows Configuration:
netsh interface ip set address "Ethernet" static 192.168.1.10 255.255.255.0 192.168.1.1
netsh interface ip set dns "Ethernet" static 8.8.8.8
Linux Configuration:
sudo ip addr add 192.168.1.10/24 dev eth0
sudo ip route add default via 192.168.1.1
echo "nameserver 8.8.8.8" | sudo tee /etc/resolv.conf
Setting Up DHCP Services
For most client devices, DHCP (Dynamic Host Configuration Protocol) automatically assigns IPv4 settings. If you're configuring a router or server to provide DHCP, you'll need to define:
- IP address pool range
- Subnet mask
- Default gateway
- DNS server addresses
- Lease time (how long devices keep their assigned IP)
A typical DHCP scope might look like this:
Network: 192.168.1.0
Subnet Mask: 255.255.255.0
Start IP: 192.168.1.100
End IP: 192.168.1.200
Default Gateway: 192.168.1.1
DNS: 8.8.8.8, 8.8.4.4
Lease Duration: 24 hours
Verifying Your Configuration
After configuring your IPv4 network services, always verify everything is working correctly. Use these commands to test connectivity:
ping 192.168.1.1          # Test gateway connectivity
ping 8.8.8.8              # Test internet connectivity
nslookup google.com       # Test DNS resolution
ipconfig /all             # View current configuration (Windows)
ip addr show              # View current configuration (Linux)
If any of these tests fail, double-check your configuration settings. The most common issues are incorrect subnet masks, wrong gateway addresses, or DNS server problems.
Common Configuration Mistakes to Avoid
As you begin working with IPv4 network configuration, watch out for these frequent pitfalls:
- Using IP addresses outside your subnet range
- Forgetting to configure the default gateway
- Setting conflicting static IP addresses
- Using the wrong subnet mask for your network size
Remember, patience is key when learning network configuration. Each mistake teaches you something valuable about how networks operate.
What's Next
Now that you understand the basics of IPv4 configuration, you're ready to explore more advanced topics like VLAN configuration, which allows you to segment your network into separate broadcast domains for improved security and performance.
Tools and resources for this topic
- CompTIA Network+ Study Guide — Comprehensive N10-009 exam preparation covering all five domains.