How to Install Python on macOS
A comprehensive guide to installing Python on macOS, covering both the official installer and Homebrew methods. Includes verification steps, environment setup, and troubleshooting common installation issues for beginners.

Getting started with Python programming on macOS can feel overwhelming when you're faced with multiple installation methods and version considerations. Let's walk through the most reliable approaches to get Python running on your Mac, whether you're completely new to programming or switching from another platform.
Understanding Python on macOS
Your Mac comes with Python 2.x pre-installed as part of macOS, but this version is deprecated and shouldn't be used for new projects. You can check what's available by opening Terminal and typing:
python3 --versionIf this command doesn't work or shows an older version, you need to install Python 3 separately. Modern Python development typically uses Python 3.10 or newer, which includes performance improvements and new features that make development more efficient.
Method 1: Official Python Installer (Recommended for Beginners)
The simplest approach is downloading Python directly from the official website:
- Visit
python.organd navigate to the Downloads section - Click the yellow "Download Python 3.x.x" button for the latest stable version
- Run the downloaded
.pkgfile and follow the installation wizard - The installer places Python in
/Library/Frameworks/Python.framework/Versions/3.x/and creates symlinks in/usr/local/bin/
After installation, verify it worked by opening a new Terminal window and running:
python3 --version
pip3 --version
You should see the version numbers for both Python and pip (Python's package manager).
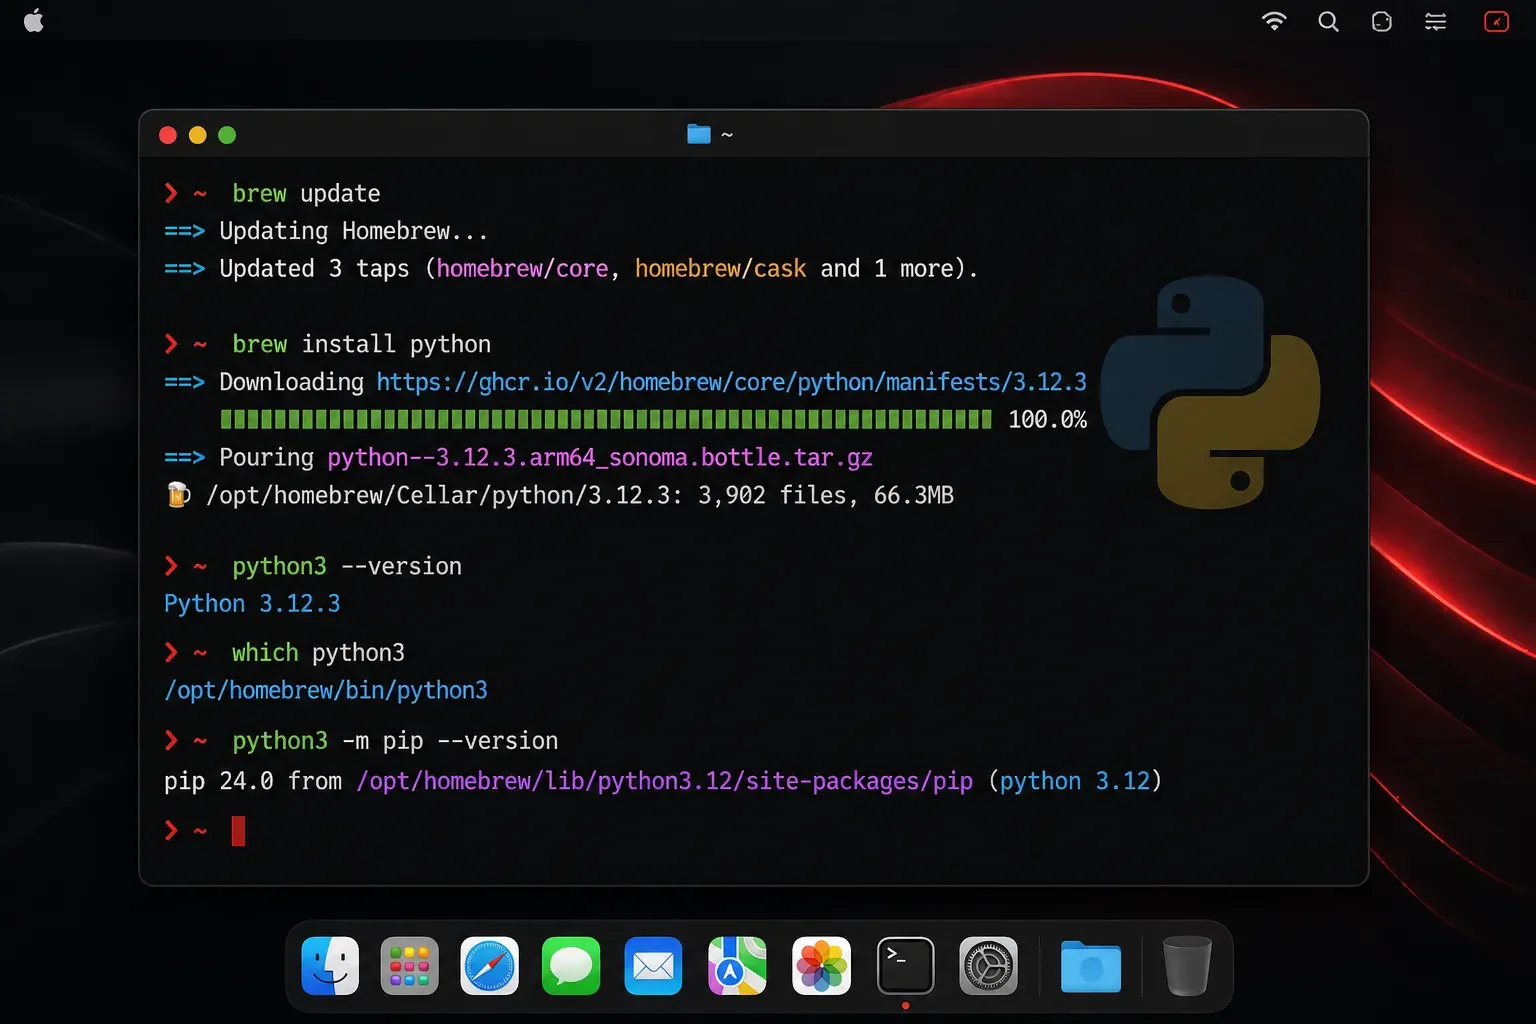
Method 2: Homebrew Installation
If you're planning to do serious development work, Homebrew offers better package management. First, install Homebrew if you haven't already:
/bin/bash -c "$(curl -fsSL https://raw.githubusercontent.com/Homebrew/install/HEAD/install.sh)"Then install Python:
brew install pythonHomebrew installs Python as python3 and includes pip automatically. It also handles updates more elegantly than the official installer. Note that on Apple Silicon Macs (M1, M2, etc.), Homebrew installs to /opt/homebrew, while on Intel Macs it uses /usr/local. The installation automatically handles these differences.
Setting Up Your Development Environment
Once Python is installed, create your first project directory:
mkdir ~/python-projects
cd ~/python-projects
Test your installation by creating a simple Python file:
echo 'print("Hello, Python!")' > hello.py
python3 hello.py
You should see Hello, Python! printed to your terminal.
Managing Python Paths and Versions
macOS can be tricky with Python paths. The system Python 2.x lives in /usr/bin/python, while your newly installed Python 3 will be in either /usr/local/bin/python3 (official installer) or /opt/homebrew/bin/python3 (Homebrew on Apple Silicon) or /usr/local/bin/python3 (Homebrew on Intel).
To see which Python you're using:
which python3If the new Python installation isn't being found, you may need to update your PATH. Add this to your shell configuration file (~/.zshrc for the default zsh shell):
For official installer:
echo 'export PATH="/usr/local/bin:$PATH"' >> ~/.zshrcFor Homebrew on Apple Silicon:
echo 'export PATH="/opt/homebrew/bin:$PATH"' >> ~/.zshrcThen reload your shell:
source ~/.zshrcIf you want to use python instead of python3, you can create an alias in your shell configuration file:
echo 'alias python=python3' >> ~/.zshrc
source ~/.zshrc
Installing Your First Package
Python's strength lies in its vast ecosystem of packages. Let's install a popular package to verify everything works:
pip3 install requestsThen test it:
python3 -c "import requests; print('Requests version:', requests.__version__)"This confirms both Python and pip are working correctly.
Troubleshooting Common Issues
If you encounter a "command not found" error, your shell might not be finding the new Python installation. Try opening a completely new Terminal window, as environment variables need to reload. If the issue persists, check your PATH configuration as described in the previous section.
For permission errors when installing packages, avoid using sudo with pip. Instead, use virtual environments (we'll cover these in an upcoming post) or the --user flag:
pip3 install --user package_nameWhat's Next
Now that Python is installed on your Mac, you're ready to start writing your first programs. In our next post, we'll explore Python virtual environments, a crucial tool for managing different projects and their dependencies without conflicts. We'll also look at choosing the right code editor to make your Python development experience smooth and productive.