Switching Features Explained: Spanning Tree Protocol and More
Essential switching features including Spanning Tree Protocol for loop prevention, trunking for VLAN extension, and port security for access control. Explains why these features are critical for network stability and security.

Network switches are the backbone of modern LANs, but they need intelligent features to prevent chaos and maintain security. Without proper configuration, switches can create network loops, security vulnerabilities, and inefficient traffic flow. Let's explore the essential switching features that keep enterprise networks running smoothly.
Spanning Tree Protocol (STP): Preventing Network Loops
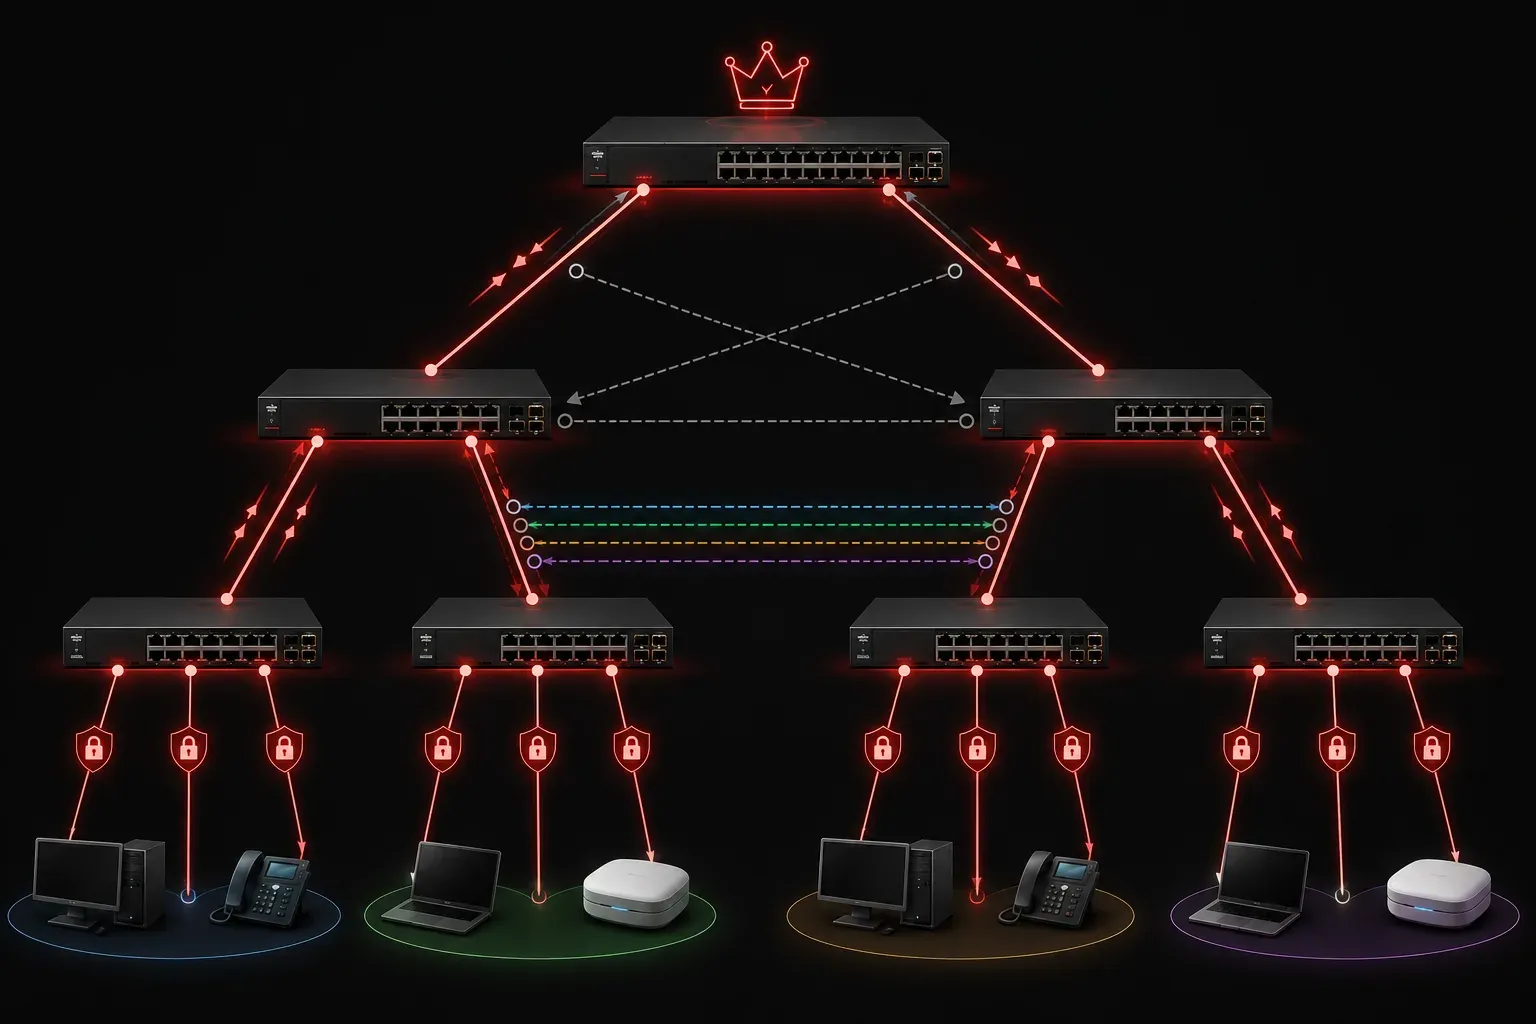
Imagine connecting multiple switches in a redundant configuration for fault tolerance. Without Spanning Tree Protocol, you'd create broadcast storms that can bring down an entire network within seconds. STP prevents these loops by intelligently blocking redundant paths while maintaining backup routes for failover.
STP works by electing a root bridge (the switch with the lowest bridge ID) and calculating the best path to this root from every other switch. Any ports that would create loops are placed in a blocking state. Here's what you'll see when checking STP status:
Switch# show spanning-tree

VLAN0001
  Spanning tree enabled protocol ieee
  Root ID    Priority    32769
             Address     0023.04ee.be01
             This bridge is the root
             Hello Time   2 sec  Max Age 20 sec  Forward Delay 15 sec

  Interface        Role Sts Cost      Prio.Nbr Type
  ---------------- ---- --- --------- -------- --------------------------------
  Fa0/1            Desg FWD 19        128.1    P2p
  Fa0/2            Desg BLK 19        128.2    P2p
Notice how port Fa0/2 is in blocking (BLK) state - this prevents a loop while keeping the port ready for failover.
STP vs. RSTP Convergence Times
It's important to understand that convergence times vary significantly between STP versions. The original IEEE 802.1D STP can take up to 50 seconds to converge after a topology change due to its timer-based operation. However, Rapid Spanning Tree Protocol (RSTP) or IEEE 802.1w dramatically reduces this convergence time to just 1-3 seconds by using a proposal/agreement mechanism instead of timers. Most modern networks use RSTP or its per-VLAN variant (PVST+) for faster recovery times.
VLAN Trunking: Extending VLANs Across Switches
Trunking allows a single physical link between switches to carry traffic for multiple VLANs simultaneously. Without trunking, you'd need a separate cable for each VLAN - imagine needing 20 cables between switches for 20 VLANs!
The most common trunking protocol is IEEE 802.1Q, which tags frames with VLAN information. When configuring a trunk port, you'll typically see:
Switch(config)# interface gigabitethernet0/1
Switch(config-if)# switchport mode trunk
Switch(config-if)# switchport trunk allowed vlan 10,20,30
This configuration creates a trunk that carries VLANs 10, 20, and 30. The switch automatically tags frames with the appropriate VLAN ID as they traverse the trunk link.
VLAN Trunking Implementation Scenarios
Trunking is essential in various network scenarios. In data center environments, trunk links between core and distribution switches often carry hundreds of VLANs to support multi-tenancy and service segregation. In campus networks, trunk links between building switches typically carry department-specific VLANs (HR, Finance, Engineering) plus management and guest VLANs. For small business deployments, even simple two-switch setups benefit from trunking to separate voice, data, and guest traffic across both switches without requiring multiple physical connections.
Port Security: Controlling Access at the Switch Level
Port security is your first line of defense against unauthorized network access. It limits which devices can connect to specific switch ports based on MAC addresses. This prevents someone from simply unplugging a legitimate device and connecting their laptop.
Here's a basic port security configuration:
Switch(config)# interface fastethernet0/5
Switch(config-if)# switchport port-security
Switch(config-if)# switchport port-security maximum 2
Switch(config-if)# switchport port-security mac-address sticky
Switch(config-if)# switchport port-security violation restrict
This configuration allows only 2 MAC addresses on the port, learns them dynamically with "sticky" learning, and restricts traffic from unauthorized MACs while logging violations.
Port Security in Different Network Scenarios
Port security implementation varies by use case. In secure office environments, ports are typically configured with a maximum of 1-2 MAC addresses to prevent desk sharing or hub connections. Conference room ports might allow 3-5 MAC addresses to accommodate multiple laptops during meetings, with violation actions set to "restrict" rather than "shutdown" to avoid disrupting presentations. For high-security areas, administrators often use static MAC address assignment combined with "shutdown" violation mode, requiring manual intervention to restore connectivity after any security breach.
Why These Features Matter
These switching features work together to create a robust network foundation:
- STP prevents network outages caused by switching loops
- Trunking optimizes cable usage and simplifies network design
- Port security blocks unauthorized access at the most granular level
In real-world deployments, you'll configure these features together. A typical enterprise switch might have trunk ports connecting to other switches (with STP preventing loops) and access ports with port security protecting end-user connections.
Common Configuration Scenarios
When troubleshooting these features, remember that the original STP can take up to 50 seconds to converge after a topology change, while RSTP reduces this to just 1-3 seconds. This is why most modern networks have migrated to RSTP or Per-VLAN Spanning Tree Plus (PVST+) for faster convergence. Similarly, if users can't access multiple VLANs, check that the appropriate VLANs are allowed on trunk links.
Port security violations often manifest as intermittent connectivity issues. Always check the security status with show port-security interface when troubleshooting access problems.
What's Next
Now that you understand these fundamental switching features, the next step is to dive deeper into VLAN implementation and inter-VLAN routing. We'll explore how to design and configure VLANs effectively, including best practices for VLAN numbering and management.
Tools and resources for this topic
- CompTIA Network+ Study Guide — Comprehensive N10-009 exam preparation covering all five domains.